Ribbon Flowers!
I've been passing a kidney stone for about a week and a half and it is getting really intense. It has been in the same spot for four days and I can't seem to concentrate on anything. The one thing I did manage to do was add some ribbon flowers to Jel's organizer.
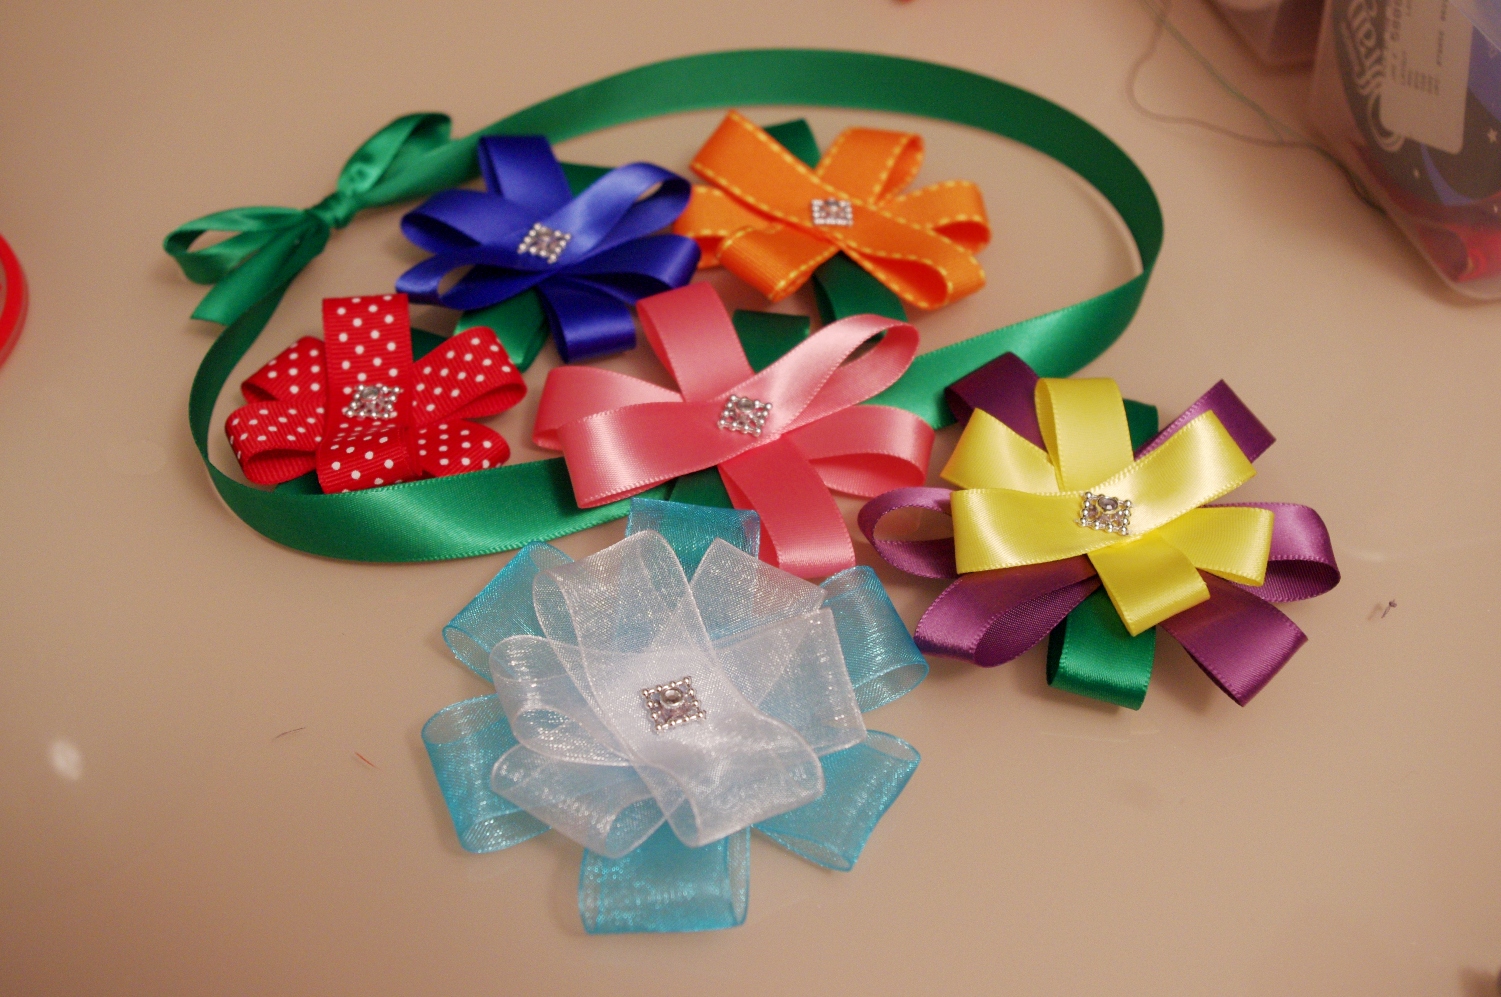
(these are cell phone picture, sorry!) I thought these would be a great surprise and add some place to put hair clips and whatnot. You can clip the hair clips to the vine or the petals. Cute?? Today I went to the emergency room because my stone hadn't moved and I was worried about a blockage. Luckily I don't have one, but I do have a small infection and my liver is functioning higher than normal, so I have to check back in with my doctor later in the week. To keep my mind off things, I made some more flowers...some for myself and some to put as new headbands in my Etsy shop, since I'm moving away from plushies. Here's a tutorial so you can make your own too!
Here's what you'll need:
ribbon
thread
needle
embellishment for center
scissors
candle
lighter
Cut your petal pieces and decide one a center embellishment.
If you want, you can add green leaves as well. Cut your ribbons at a length you like (you can make all kinds of sizes). I just eyeballed mine.
Heat seal the ends of your ribbons so they don't fray. Simple hold the edges near, but not in the flame until the end melts slightly. This will dry quickly and act as a glue.
All sealed!
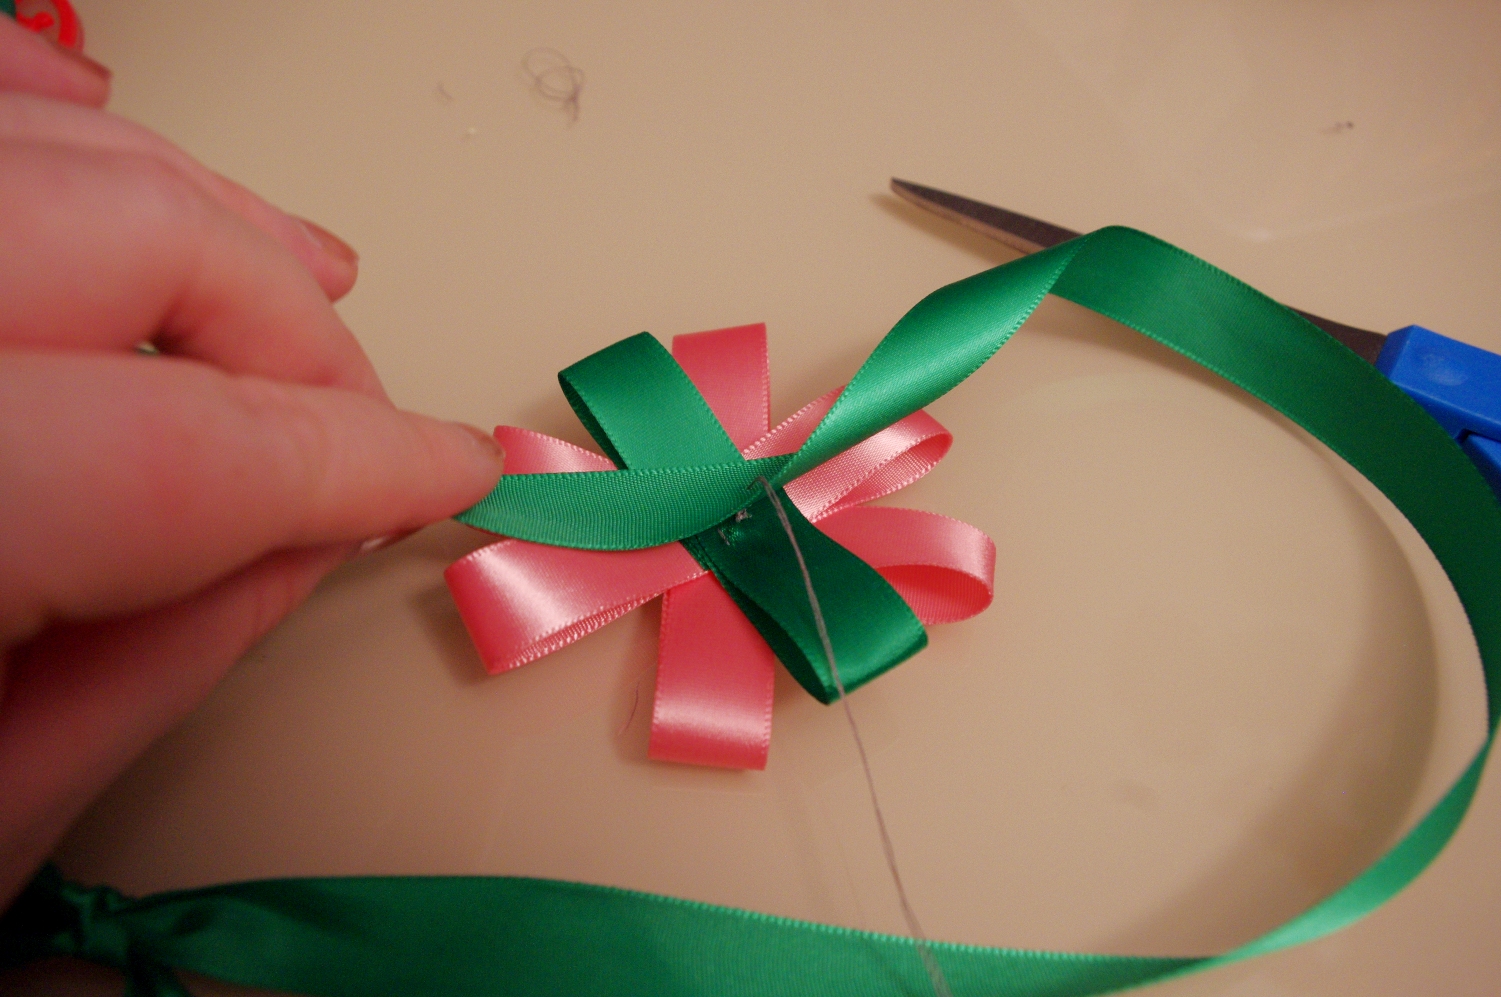
Start with your leaves. Fold your ends into the middle and thread your needles through.
Next add your petals. Here's a better description of how to fold the ribbon. Connect the ends and pinch them together with your fingers.
Flatten your loop so you have two loops.
Thread your needle through the center, ends side first.
Continue threading as many petals as you like.

Once you're satisfied with the petals, you can add your center.
I chose a sparkly embellishment that I could sew on.
Sew your embellishment in the center.
Secure your embellishment several times.
Tie your thread.
And you're done!
They're super cute on their own, or you can secure them to a headband.
I secured mine onto a piece of ribbon.
Just a few stitches!
Tie the thread and you have a very floral headband. :)
Like my fashionable IV bandage? This was a fun project that I could do without concentrating much, which is exactly what I needed...something to distract me but that I couldn't mess up if I suddenly got bad pain. What do you think? I'm going to be adding some items to my shop based on these. Do you think you'll give them a try or do you have similar projects of your own?

.JPG)