Saturday, April 14, 2012

Organization


I had the week off last week, and while I had a lot to do, I found a little time to do some spring cleaning and organizing. I don't have any pictures of my bedroom closet and sewing room closet, but those took up most of the time. I put a shoe organizer in my sewing room closet to put odds and ends, and I bought a small shelf from Ikea. Since I've been taking grad school classes, I've been collecting lots of books and papers. I needed somewhere to put them. 


I put this next to my sewing tables, and it has become a great place for my sewing and schooling things.


I put my teacher things on the bottom shelf. All my text books, along with a few folders full of teacher resources, like all those articles about teaching I've collected over the years, found their home here. I had a lot of great articles hiding in a box in my closet. Now they're right where I need them! And of course, who wouldn't want an iron for a book end? lol


Next, I've got all my children's books. I've collected quite a few of these this semester. It's exciting to start building a children's library. Slowly but surely. And my sewing machine manuals and patterns are in that pink box.


This is mostly decorative, but I found a place to store all those ribbon flowers I made. When I want to use one, it's right there! I found these cute little hedgehogs at Target in December. They were just a couple dollars on clearance. And so cute!


I got a new magnetic whiteboard at Wal-Mart. Just a nice place to put the list of things I need to sew. And on the top shelf of the book shelf, I have baskets of all the clothes I need to tailor, projects I'm working on, and scraps. 


I found the idea for this one on my organization board on Pinterest. I didn't use any dowels, though.


I put my thread on this standard holder on the wall. This is sort of my "hometown wall." I got the metal keys in Leavenworth, WA while I was visiting family. If you haven't heard of Leavenworth....go there. It's a really cool Bavarian village in Washington State, not far from my hometown. It's one of my favorite places. We stayed at a great bed and breakfast while we were there at Christmas. I miss it. The wooden key was made by my grandfather, all from one piece of wood. Isn't he talented? And the apple wall hanging was bought at Christmas Tree Shops. My town used to be the apple capital of the world. It isn't anymore, but they still milk it. :) And that's my spring cleaning/organizing of my sewing room. Do you have any plans this spring?

Friday, April 13, 2012

Learning New Techniques - Ruffles!!

I've been following See Kate Sew for a while, and right now she is hosting a whole month of ruffles! I haven't used a ton of ruffles in my sewing, mostly because they can be so time consuming to create. Well, I finally bit the bullet and bought a ruffler foot...*dramatic music, please*


If you hadn't noticed (perhaps because you don't memorize my sewing machines), this thing is not attached to my usual sewing machine, my Brother XL2600...oh no. Why, you might ask?


This is why. The scrap on the left was ruffled to death with totally disgusting, horribly executed "ruffles." They do not even qualify, really, because the tension was so horribly off...or something. And the foot didn't seem to fit quite right on the machine. It just seemed off, and despite a couple hours trolling around looking for answers, I decided to just put it on the Big Brother, my SE-400. Much better!


Sorry, Little Brother. You lose on this one. Your big brother is just too advanced, and fine tuned, or...something. The foot fits, and ruffled beautifully. Can't wait to use it on a real project! What I did work on today was a summer shirt, while I was home after catching a virus from one of the kiddos at work (I mean, how long can you avoid catching a bug when the kiddo has a 102* fever and is sneezing in your face? No amount of hand washing and Emergen-C can account for that).


Ta-da! This was initially going to be a nightgown, however I couldn't come up with a pattern I liked. But this beautiful garment emerged organically from my failed project and I just love it! It is made from an organic cotton voile that I bought a long time ago at Gather Here. I've never sewn with this fabric before, but it is true what they say...it drapes nicely and feels like buttuh! (Little throw back, remember Mike Meyers on SNL? Those were good times.) 


I also tried a new technique...shirring! I don't know how I've never tried this before. I used elastic thread and just sewed lots of basting stitches along my fabric. And voila! A cute, stretchy strapless top for summer!


I added a little ruffle at the neckline to give it a little more coverage and a bit of a sweetheart look to it. It is so breezy and light and cozy!


I need to take some nicer pictures, but I'll do that another day. For now, I'm pooped. Time for bed, and hopefully my headache and chills will work themselves out of my system. 


Tuesday, April 3, 2012

Balcony Makeover and Bamboo Screen Tutorial


I recently decided that we needed to do a major makeover on our balcony. We moved in last year and were really dragging our feet about making it a usable space. Last summer, I planted some veggies and herbs, but that wasn't enough to get me out there and enjoy the weather. Perhaps it was the $5 plastic chairs from CVS, or the lack of shade and privacy. Either way, I decided this year, things were going to change! I've been gathering ideas on Pinterest, on my Balcony Inspirations board. I took the opportunity of the family I work for taking a two week vacation to take on the project. My boyfriend and I found some great Ikea patio furniture with a bench, two chairs and table for just $100, some cushions from Target for $12 each (actually cheaper than making my own, as it turns out), and some flower seeds/bulbs. My boyfriend said he wanted some kind of screen for privacy, since our townhouse looks out on the street and the kids in our complex often play in our "backyard" (it's really community space, so we have no real claim to it, and since it is the largest backyard, I guess we luck out. It's just really hard to relax when there are 12 year olds playing baseball or tag right below our balcony). After looking for many DIY ways of creating a privacy screen, we found some large bamboo poles at Ocean State Job Lot for just $1.39 a piece, and with some zip ties and rope, we created this really beautiful bamboo privacy screen. I love it!


There's our new patio set, such a great buy! And some citronella candles from Christmas Tree Shops...how are there already mosquitoes??


I hung some lantern-style lights above the screen to add some soft lighting. We also bought two solar lamps to put in the planters, although they don't add too much light. I got bamboo stakes to support the flowers that will go in that planter. 


Here I am planting my flowers...here's hoping they grow better than my veggies did!

Here's the layout. You have to kind of use your imagination for this part of the "tour." As you come out the back door, there will be a *I hope* lush balcony garden acting as a screen for this side of the balcony. There is a bleeding heart in the smaller planter (and I hope it has enough room in there or I will have to transfer it). I love bleeding hearts, and since it is a perennial flower that withstands cold climates, I hope this will stay with us for a while. I haven't planted the star flowers yet, but they will go in the orange planter, and will stand about  2 feet, providing a little privacy there. 


These three hanging planters are simply held by zip ties again, and will have orange cosmos, baby blue eyes nemophilas, and butterfly hybrid impatiens. I've never grown flowers all on my own, so here's hoping I don't kill them! 


 I am so excited for this one...I hope it has enough room in there. 


This is on the long wall, next to the bamboo screen, and will house imperial giant larkspurs. I LOVE these flowers, with their tall stalks full of blooms. They will be 4-5 feet tall, and will provide even more privacy. The more exotic of the plants we bought is a palm, which can't come outside yet because it is too cold. It will go in the corner between all the flowers and will be the final piece to the privacy garden. I can't wait to see what this all looks like!

Now, here's how we made the screen. It's pretty straight forward. 


You will need bamboo poles (ours are something like 6 feet tall and we used 20...that will vary depending on your space), a ton of zip ties in small and medium sizes, and rope. We bought everything at Job Lot fairly inexpensively. 


Lay your poles on a flat surface. Tie the zip ties in three places along the poles. Imagine how blinds are set up. Tie the larger zip ties around the bamboo poles, securing loosely. Next, use a smaller zip tie to tie two larger ties together. Pull just until the small zip tie starts to zip. You are basically constructing a chain, like the paper chains you might have made in elementary school. Once you have the smaller tie attached, you can pull the larger tie tight around the bamboo pole. Do this until all the bamboo are attached. Then you can fiddle with the tightness of the small ties until you are happy with the way it hangs. This was the most complicated part of the project. Once you are happy with everything, you can snip the ends of the ties.


Finally, tie your top pole to your balcony railing. We also secured our bamboo in several places so it wouldn't blow in the wind and make lots of noise. 


Not only does this add slight privacy and shade, but also beauty. Enjoy!

*Ironically, we went to Kmart for more potting soil, and found some rolled bamboo fencing that would do a similar job. However, it costs $60, and the bamboo is tiny. I like our DIY better. :)

Saturday, March 17, 2012

Rainbow Hunt

One day, I was out and about with the little boy I nanny, and we needed something to keep ourselves busy. I came up with the idea of a Rainbow Hunt, not only to give our outing a purpose, but also to reinforce color identification (and give a little informal assessment...not necessary as a nanny, but interesting as a teacher to see if he could identify the colors in an organic setting). I will definitely be using this activity in the future, with my own children and in a classroom setting. Here's some of the items we found. 

Red

orange

yellow


yellow 

yellow (we got really into yellow that day!)

green

green

pink

 
purple

This actually spun off into a fire hydrant study...now whenever we're out walking around, we have to stop at all the fire hydrants and take their picture, to be cataloged later. There are actually a ton of different kinds of hydrants in his neighborhood, and it's become a great inquiry unit, in the broadest sense. I'm now working on a photo album of all of our pictures we've taken on our walks, organized by color. I can't wait to see how he interacts with it, and what he remembers. 

 Would you do this activity with the children in your life? 

Tuesday, March 13, 2012

Newest Plushie

Here's my latest project...a super soft cream mohair bear with pink ribbon for a friend's baby. I'm making a taggie with coordinating colors, but that's not done yet. I've never worked with this kind of traditional plush fabric before and let me tell you...it's a pain! Little hairs everywhere! I think I breathed in about a pound! But man, does it make a great bear! What do you think? What are you working on these days?

Saturday, February 18, 2012

Nautical Wrap Dress Take 2


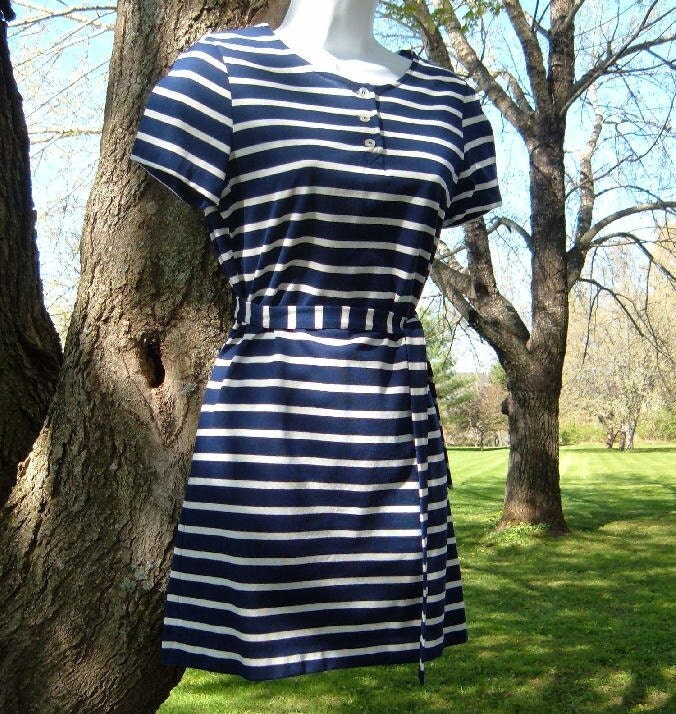
I fixed my Nautical Wrap Dress and let me just say...SO MUCH BETTER! I also did a real hem on all edges and put a pleat in the neckline to make the back neckline smaller (much better fit!). I used a simple white light-weight quilter's cotton to make the ties, and made a hole to slip one through at the side seam on one side (and very crudely hemmed that with a very wide, very short zig-zag stitch). I absolutely love how the bow came out, and the fit is fabulous. I must say, this is my most wearable item of DIY clothing. Perfect for our weekend in Cape Cod to celebrate our 5th anniversary. Ok...no more technology. Hope you're having a great weekend everyone!

Monday, February 13, 2012

Nautical Jersey Wrap Dress - Take 1

*Disclaimer* These were taken at 11pm after a long day of work, class, and paper writing. Also, I did not use an iron...obviously. I just really wanted to post this!


Last week, I went to Gather Here in Cambridge, MA to buy some new fabric. I ran across this great blue and white nautical organic jersey that I thought would be perfect for a wrap dress. I have this great blue wrap dress from Banana Republic that fits like a dream...and I wanted another one! Well...this is the first step in the process. I thought I would be creative and use buttons instead of ties to make it a little unique, and maybe even a little cuter. Turns out you shouldn't try to reinvent the wheel. I didn't alter the shape of the bodice pieces to accommodate this (= baggy neckline), and as the day goes by, the soft, stretchy jersey gets too loose for a little button to hold it in place. Well...lesson learned. Take 2 will have to wait til I get a little more free time, but until then, I'm pretty happy with it! It's super cozy, and the pattern is very contemporary. Just take a look at these beautiful pieces. 


Check out more cute nautical inspirations here!


I did a simple rolled hem with my serger. I thought about doing a bold lining, but I didn't have a white jersey, and I thought a stiffer cotton would make it drape wrong. I'm thinking about doing a full hem around all the edges, but I'm going to wait and see what it looks like once I put on the ties. I am thinking of making the ties out of a bright white. Hopefully in jersey, but perhaps in some spare cotton lining I have lying around. We'll see. Mainly I didn't want to do the ties because you need to have a hole in the hem to pass the tie through, and I hate needing to wear something underneath so you're not just looking at my side. Anyhow, I admit defeat, and will have to continue this project another day. I am already fantasizing about graduating from school and having free time again! It hasn't even been a year yet! Whew! 

Any suggestions on how I could improve this piece? 

Oh, and a great, big Happy Anniversary to my boyfriend! (although he doesn't really read the blog...he lives it. lol). We've been together for 5 years now...what a great Valentine's Day to celebrate! We're doing a quiet night at home, and then possibly visiting the Cape over the weekend. I would love to have this done by then...very sea worthy! What are your plans?